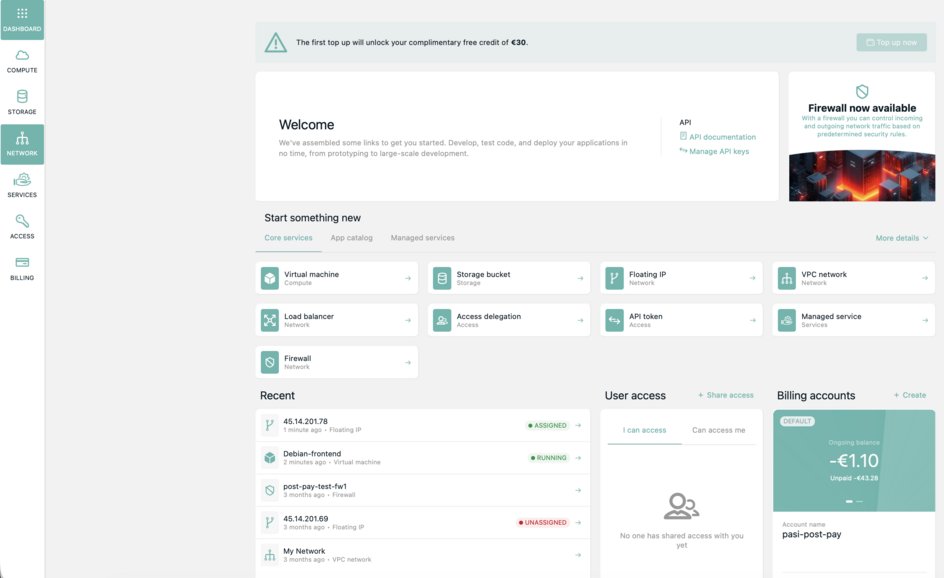
First you need to create account. Choose create account from login page.
Second, before creating any resources, you must set up one billing method.
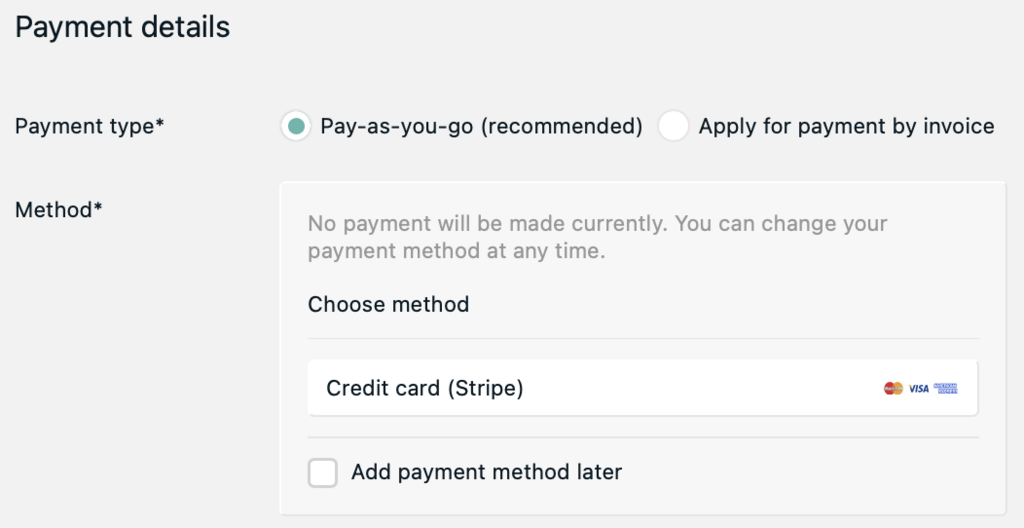
A) Set up prepaid billing:
1. Create one billing method. Enter your payment method (credit or debit card) for prepaid or apply for post-paid.
Note for post-paid application: Submitted application is sent for review. It will be processed latest the next business day.
2. Provide your billing details.
3. Confirm your account.
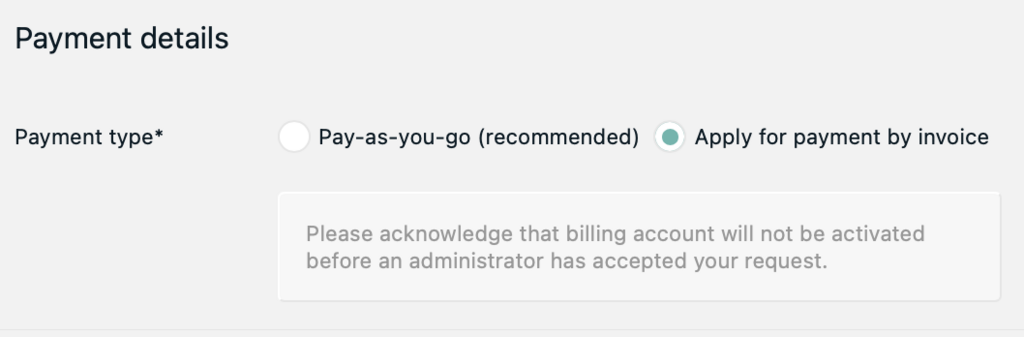
B) Set up post-paid billing:
1. Create one billing method by providing your billing details. Choose apply for post-paid at the bottom of the form.
2. Confirm your account.
3. Submitted application is sent for review. It will be processed latest the next business day.
Multiple billing methods can exists.
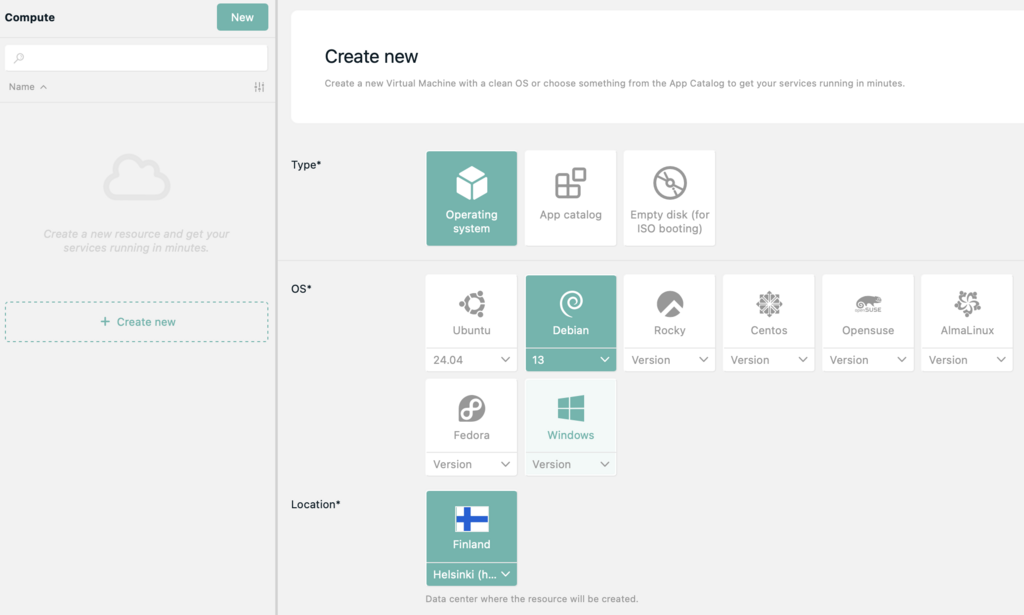
Go to compute and click new button
After clicking new you can choose the Type and Operation system of your virtual server.
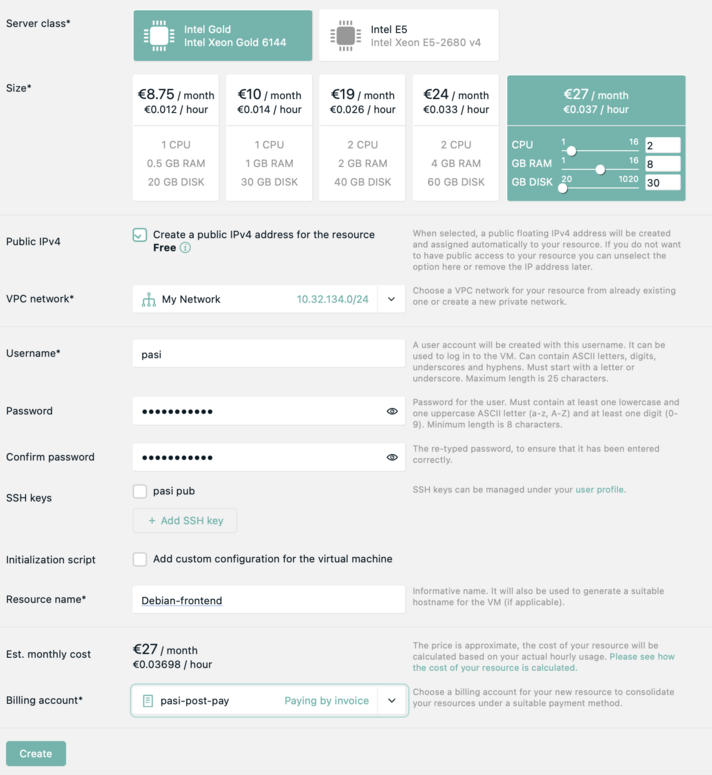
Choose which Size to your virtual server from options provided or configure virtual server to your needs.
CPU, RAM and Disk can be upgraded later for existing virtual servers.
Configure network.
Choose username and password. SSH keys can be used instead of passwords.
Name your virtual server.
Choose which of your billing accounts to use for this resource.
Finally click Create.
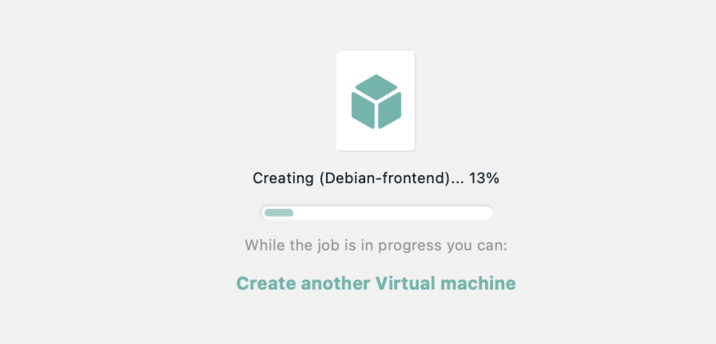
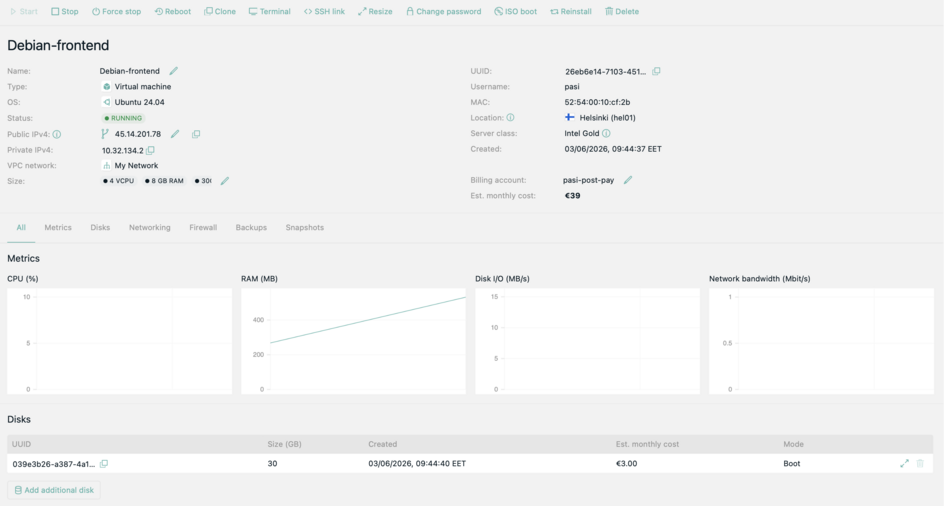
Your server will be created.
Once creation is finished you will see the details of your new resource.
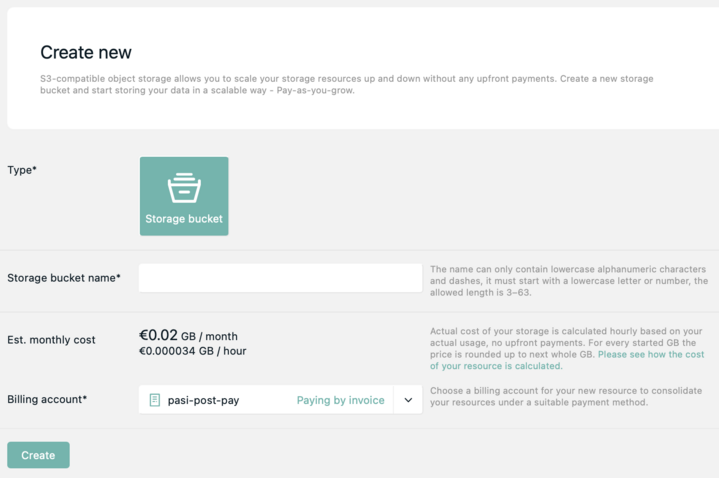
S3 compatible buckets can be created. Hourly billing.


Services section enables creation of databases easily.

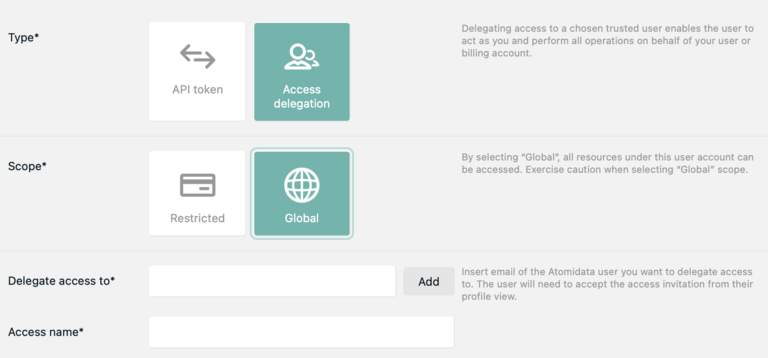
Access delegation enables for example company's main account to allow team members to manage virtual server.
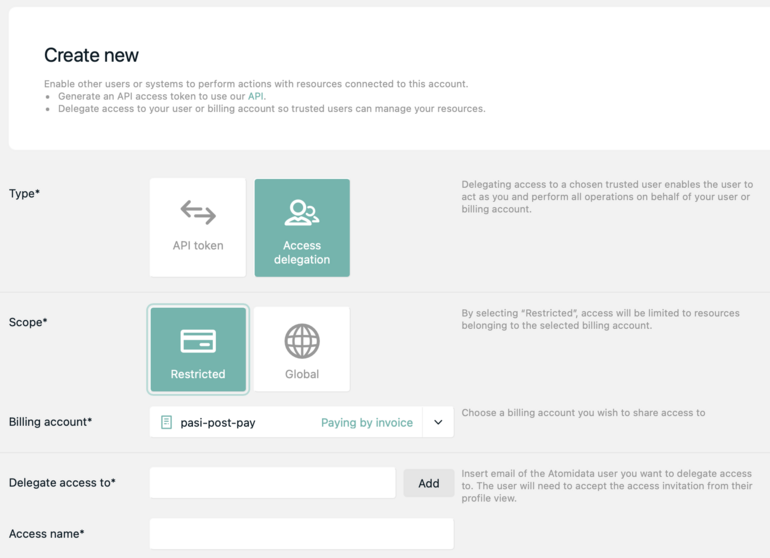
In restricted access scope (above) only resources associated with certain billing are allowed. In global scope (below) all account's resources are granted access to.
To set up prepaid billing:
1. Create one billing method. Enter your payment method (credit or debit card) for prepaid or apply for post-paid.
Note for post-paid application: Submitted application is sent for review. It will be processed latest the next business day.
2. Provide your billing details.
3. Confirm your account.
Multiple billing methods can exists.
1. Create one billing method by providing your billing details. Choose apply for post-paid at the bottom of the form.
2. Confirm your account.
3. Submitted application is sent for review. It will be processed latest the next business day.